Flash and butt welds are tested much like other resistance welds. Quality criteria is established at the start of a production run. This criteria is used for subsequent evaluation during the manufacturing process. Tensile or destructive testing is the normal method of testing random samples during a production run.
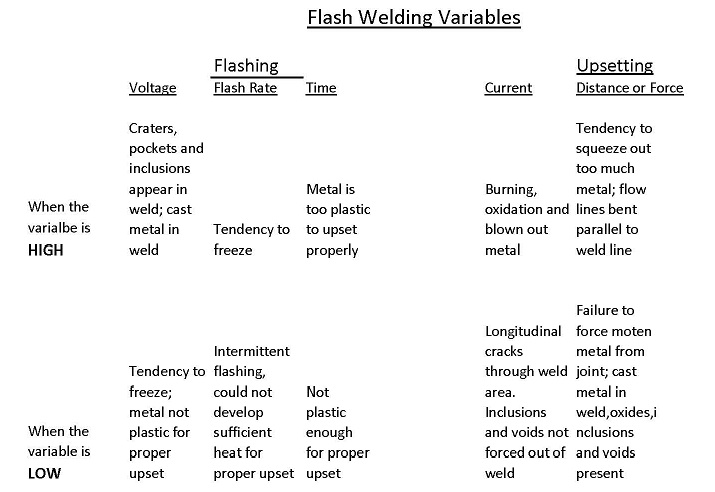
Random samples are pulled during a run for testing. The parts are visually inspected for amount of upset and appearance. Tensile testing may be specified and can be performed per the quality program. Bend tests are frequently performed. These destructive bend tests allow us to see the joints general strength and other criteria specified in the quality specifications for the part. Visual observations for voids, inclusions and cracks before and after testing are normally performed. Visual observations may indicate too little or too much heat during the welding as shown in the table below:

This chart indicates several variables and results of variations upon weld results during flash welding.
Reference: RWMA Resistance Welding Manual Section 5

