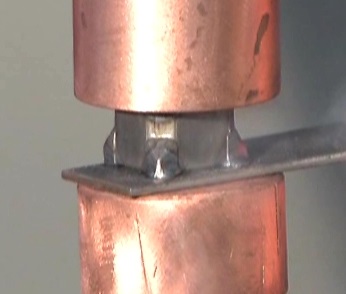
Weld nut set down can be defined as the gap between the weld nut and the stamping. Parallelism of the set down is also a consideration for many applications. At this time there is no accepted industry standard for weld nut or projection weld set down.
The type of part. It’s location in the assembly. The method that force is applied in use. Is it a safety application? Will a coating be applied? These and many other design issues may influence the set down standard being applied to the part. Industry has not developed a common standard.

Projection Nut Weld
Below is a sampling of a few simplified descriptions of set down and parallelism applied by different OEM’s.
OEM-1
…shall be set down so that the gap between the base of the fastener and the mating part is no more than 0.3 mm or 30% of the pre-weld projection height (whichever is less) and is not a criterion for welds to be discrepant…
…side-to-side gap shall not differ by more than 0.2 mm, but is not a criterion for welds to be discrepant…
OEM-2
…the fastener maximum gap is 0.1 mm, with a target value is 0.00 mm…
OEM-3
…discrepant if the gap between the welded parts exceeds 20% of the original projection height…
OEM-4
…parallelism of the welding projections of max. 0.1 mm relative to the contacting surface…
As can be seen from the above snippets of information, no one agrees with any one. The values are either percentages of projection heights or hard values, or both. Some consider anything in excess of the stated values to be cause for a weld discrepancy, while others do not. Some address both Set-Down and Parallelism, while others address only one, or the other. Frankly, this level of inconsistency with regard to a single data point is rare in the welding industry.
The possible reasons for these differences are varied. However, they can be boiled down to a few board categories.
• In-Process vs. Structural: Are the projection welds in question strictly manufacturing welds, or are they needed to carry an actual load? An example of a manufacturing application might be a weld nut that has a subsequent bolt and assembly process that might be critical, but once torque is achieved, the welds on the actual nut could instantly disappear and there would be no loss of functionality. Reparability might suffer, but the final product will be fine.
• Type of Loading: The vast majority (but not all) of PW applications have the load applied to the part in a compressive nature. It does not take much imagination to visualize the various OEMs processing their PW applications in differing manners (think applied loads in tension or shear), each with their own level of acceptability requirements.
• Assembly Issues: In some cases, the design can be so tight that excessive (or even moderate) Set-Down values might result in part fit-up issues. This can be seen in areas where many items are coming together in a confined space. As an example, an automotive B-pillar.
• Issues in Paint: While less common, it is possible for the space between the welded parts to act as a trap. The vast majority of weld nuts are located in areas where this not an issue. However, in those cases where any kind of redeposit can occur, you can bet the chorus requesting a ‘Zero’ Set-Down weld will be loud and persuasive.
Taken as a whole, it is best to keep the set down the value to less than 20% of the projection height. As indicated from above one can run into issues even with this ‘Rule-of-Thumb’ due to varying base metal gauges, coatings, and strengths.
References: RWMA – Resistance Welding Manual 4th Edition
AWS – AWS Standard C1.1 Recommended Practices for Resistance Welding
Technical Input by - DONALD F. MAATZ Jr.

